How to Install Simplisafe Entry Sensor on Door
Thinking about ordering SimpliSafe? Maybe your new SimpliSafe system just arrived and you're wondering how to get started. Either way, we think you'll find loads of great information in this hands-on SimpliSafe installation guide.
We've spent lots of time (nearly 100 hours!) testing and reviewing this popular home security system. It actually ranks #1 on our 'Top 10 Best' list. And guess what, ease-of-installation was a big part of that.
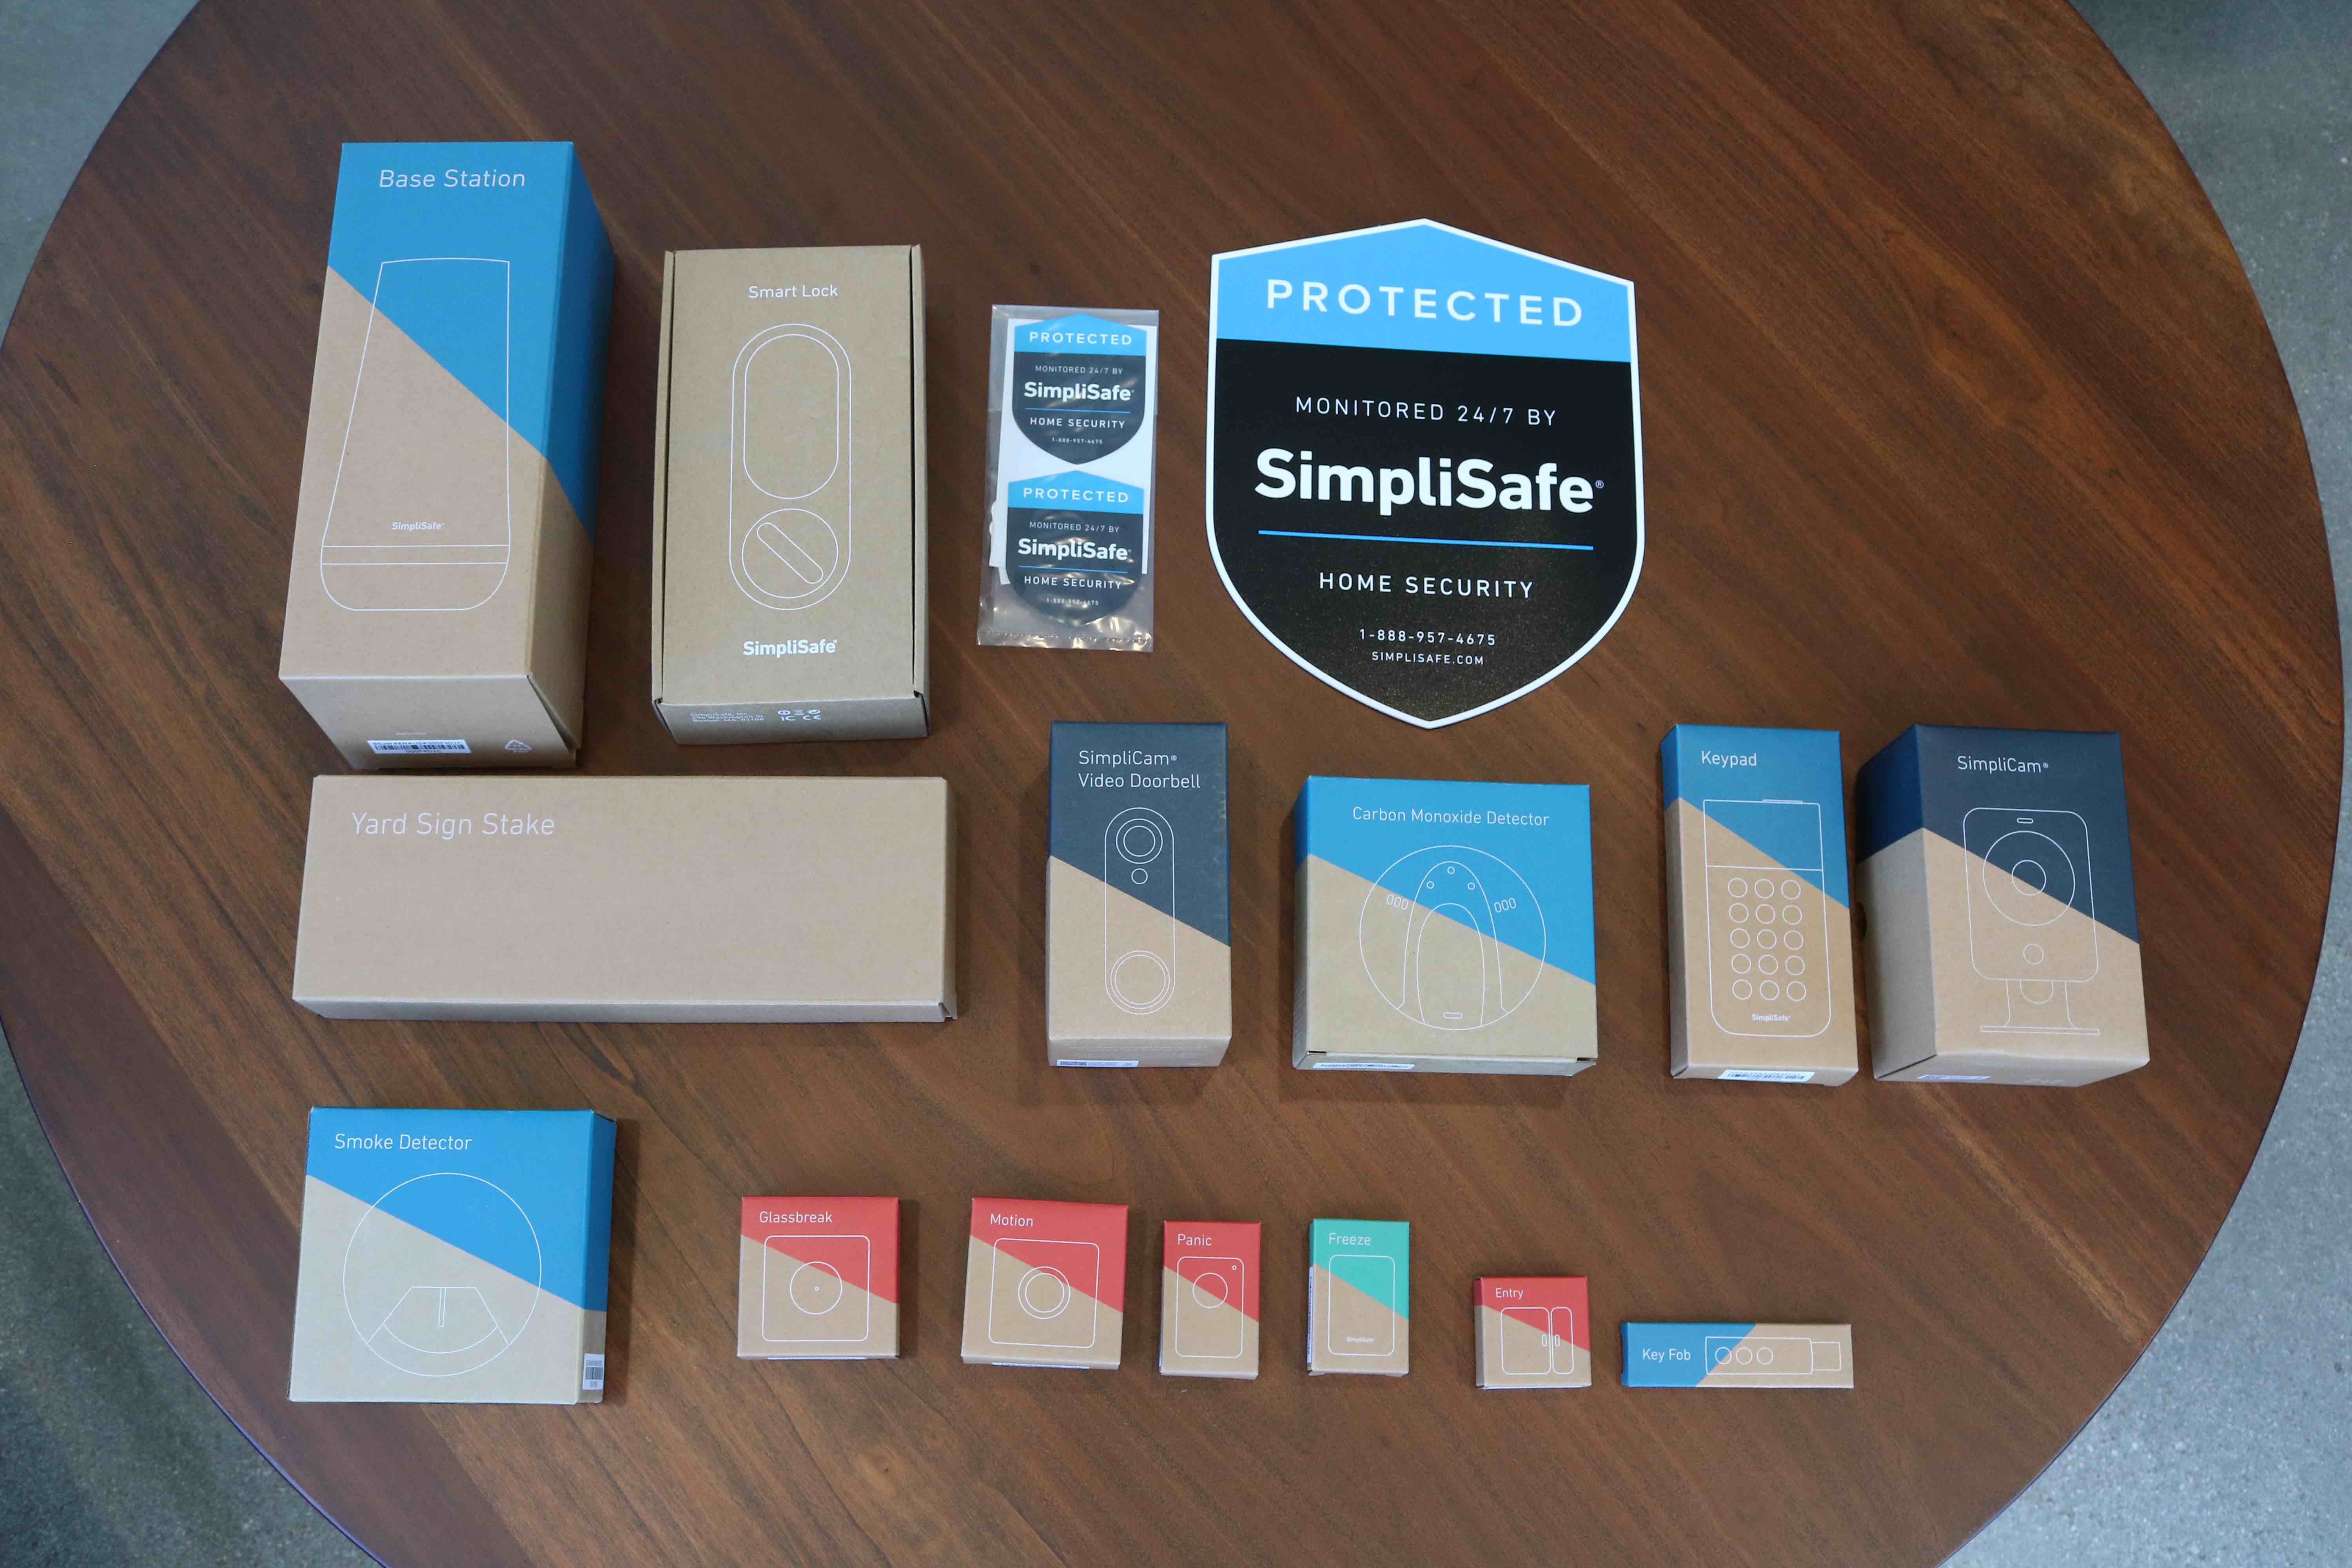
Our SimpliSafe Equipment – Before Installation
But we understand that installing new technology can be intimidating (even downright scary). Not SimpliSafe! The word 'simple' is in the name. Even if you've been burnt by DIY projects in the past — with parts and pieces still strewn about your house — we don't think you'll have trouble getting SimpliSafe working for you.
We're going to take you step-by-step through our experience setting up SimpliSafe. Whether you have your eye on a SimpliSafe package, or it's already on order… or even if the kit is already sitting on your kitchen table, staring at you and taunting you… this one's for you.
SimpliSafe Installation Overview
| Product | Type of Product | Installation Difficulty | Time to Install |
|---|---|---|---|
| SimpliSafe Hub | Base Station | Easy | 1 minute |
| SimpliSafe Keypad | Control Panel | Easy | 1 minute |
| SimpliSafe Intrusion Sensors | Entry Sensors | Easy | 10 minutes |
| SimpliSafe Water Sensor | Environmental Sensor | Easy | 1 minute |
| SimpliCam | Security Camera | Moderate | 5-10 minutes |
| SimpliSafe Video Doorbell Pro | Doorbell Camera | Moderate | 15-20 minutes |
Let's Dive into the SimpliSafe Installation Process
First things first: take stock. We highly recommend unboxing your system and laying the individual components on a clean, flat service. We've found that this simple step makes all the difference in the world.
Base Station and Wireless Keypad Setup
In the box you'll find a little card that tells you to plug in the base station. But don't just plug it in anywhere, try to place it central in your house, as it has a built-in siren that must reach into every nook and cranny of your home. We put ours near our entryway.
When your base station powers on, a blue light will emit from the bottom of the unit. You'll hear a soothing female voice say "Welcome to SimpliSafe." If you read our in-depth SimpliSafe review, you'll know that the voice nearly transported us into a dream-like state.
You'll then turn on the wireless keypad, which will automatically link to the hub. If we're being honest, we didn't love the push-button keypad, but thankfully SimpliSafe's Interactive plan also comes with app-based controls. So we ended up using our iPhone to manage the system 95% of the time. If a touchscreen keypad is important to you, we recommend checking out Vivint or even the new ADT Pulse systems.
Next, you'll connect SimpliSafe to your local Wi-Fi network and choose a 4-digit master PIN (make it memorable!). So far, so easy.
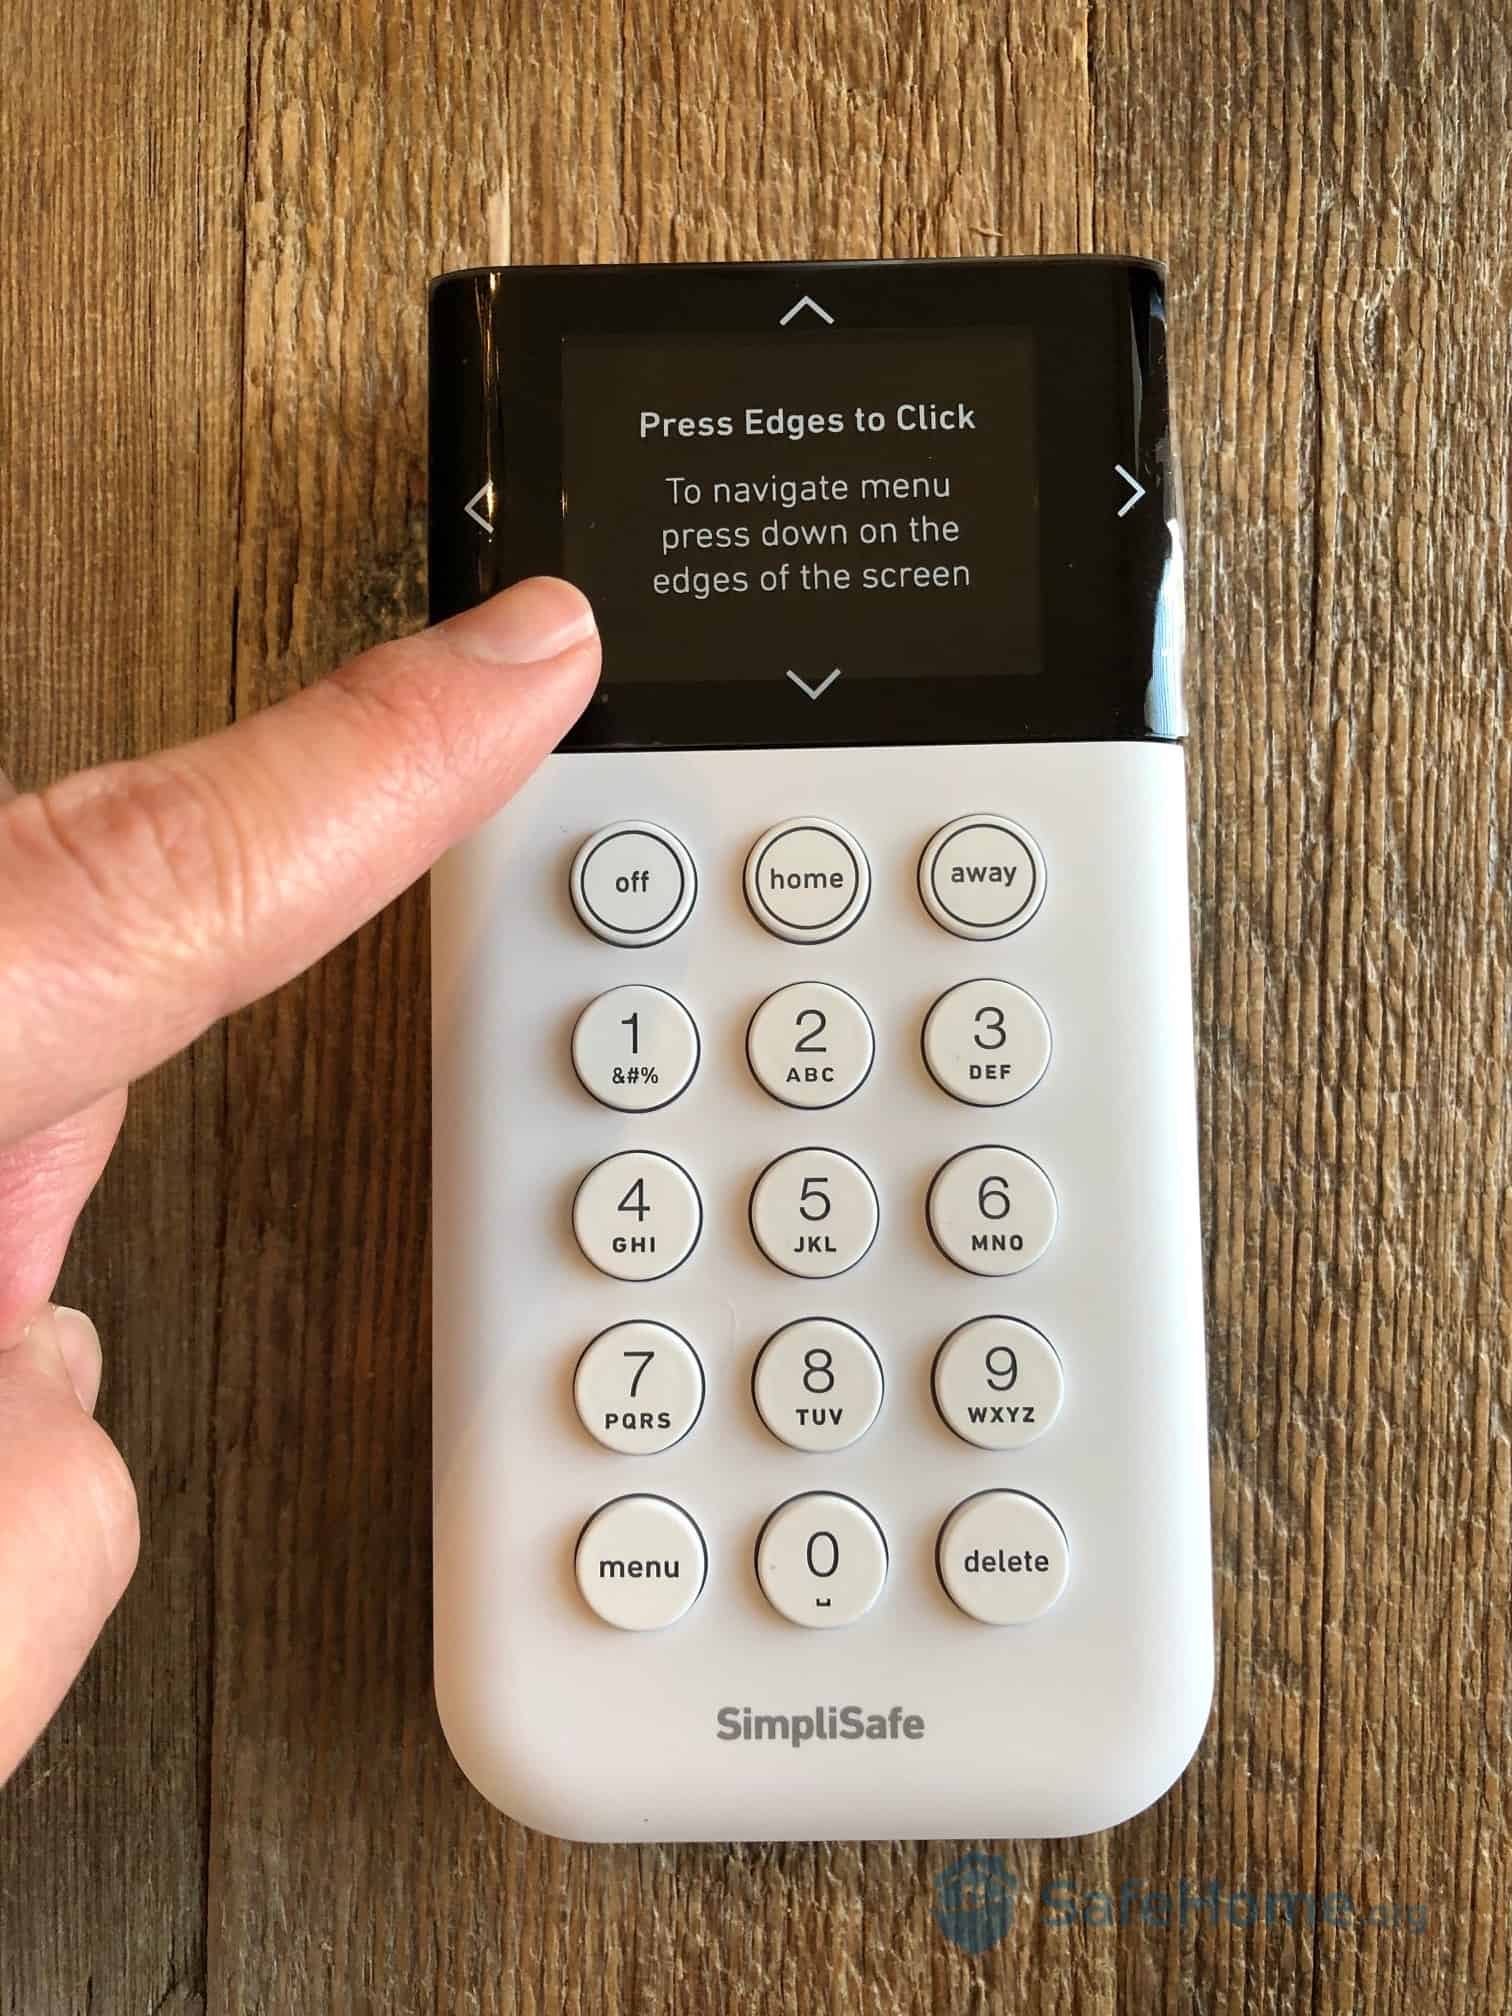
SimpliSafe Wireless Keypad Menu
Mounting the Sensors
With your base station hub plugged in and the keypad ready to go, all that's left to do is install the individual sensors.
You'll mount the door/window sensors using the included adhesive strips. An alternative is to use Velcro strips, which is a method we're big fans of. This little-known secret allows you to easily pop off the sensors from your door frames, which is great for changing batteries and moving the system to a different address.
Did You Know: Like most DIY security systems, SimpliSafe offers all kinds of installation support. There's an online help center, troubleshooting guide, owner's manuals, user forums, and live customer service every day from 8 am to midnight EST. Their live customer support hours are some of the best we've seen in the industry.
When mounting the little magnetic sensors, you'll want to be sure to keep the magnet within 2 inches of the sensor, otherwise it won't work. Don't worry, you'll see a little blue light blink on the sensor when it's working correctly. One quick tip that will save you some time is to take the wireless keypad with you as you go from room to room mounting the sensors. This way you can name each sensor as you go.
That's all there is to it! You should set aside about 20-30 minutes to complete the installation. We found it to be super-intuitive and actually sort of enjoyable.
How Easy Is It?
Now, we know that context is everything. That is, we might say something is "easy," but your "easy" might be way different than ours. With this in mind, we made the chart below that shows SimpliSafe installation side-by-side with other top DIY home security systems. This should put it in perspective for you.
DIY Alarm System Installation
| Price Range | Installation Difficulty | SecureScore: Ease of Use | |
|---|---|---|---|
| SimpliSafe | $183+ | Very Easy | 9.7 |
| Ring Alarm | $199+ | Easy | 7.9 |
| Abode | $199+ | Easy | 8.0 |
| Frontpoint | $430+ | Easy/Moderate | 7.8 |
| Brinks | $199+ | Easy/Moderate | 7.7 |
| Alder Security | N/A | Moderate | 7.6 |
SimpliSafe Installation At-A-Glance
We think the best way to learn how to set up SimpliSafe is by going along for the ride with us. That's why we shared our full experience above. But we think you'll like this next section if you just want a handy at-a-glance guide for a little boost of confidence. It shows you exactly what you can expect with each individual SimpliSafe component.
SimpliSafe Base Station
- Cost: $114.99 when purchased separately
- Requirements: Wi-Fi network, AC power
- Wired or Wireless: Wired (power cord)
- Tools Needed: No tools needed
- Setup Time: Less than a minute
- Online Installation Guide: Yes
- In-App Instructions: Yes
Base Station Step-By-Step Installation Instructions
- Place your Base Station in a centrally located area of your home.
- Plug it into a power outlet that is not controlled by a light switch using the included power cord.
- The Base Station's LED light will glow with a soft blue when it is armed, and the light turns off when the system is disarmed. Note that this is the exact opposite of Ring Alarm. So if you're a former Ring Alarm user, blue means "armed" not "disarmed."
SimpliSafe Keypad
- Cost: $69.99 each
- Wired or Wireless: Wireless
- Tools Needed: No tools needed
- Setup Time: Less than a minute
- Online Installation Guide: Yes
- In-App Instructions: Yes
Keypad Step-By-Step Installation Instructions
- Follow the onscreen instructions for setting up the Master PIN.
- Remove the coating of the peel-and-stick adhesive on back of the Keypad.
- Mount the Keypad to a wall (we put ours near our main entrance). You'll still be able to slide it in and out of the mounting bracket. Note that you don't have to mount the keypad, you can place it on a table or counter.
- Press down on the side of the screen to navigate the Keypad menus. This felt strange at first, but we got used to it pretty quickly.
- Install and name your sensors with the Keypad by doing the following:
Press the 'Test' button on a sensor to test and name it. When the Keypad prompts you, you can then remove the battery tab on the device/sensor you want to install.
FYI: The SimpliSafe keypad might take some getting used to. You'll press the sides of the screen to toggle from window to window. It's a new design that we haven't seen before. But honestly, it's growing on us.
SimpliSafe Motion Sensors
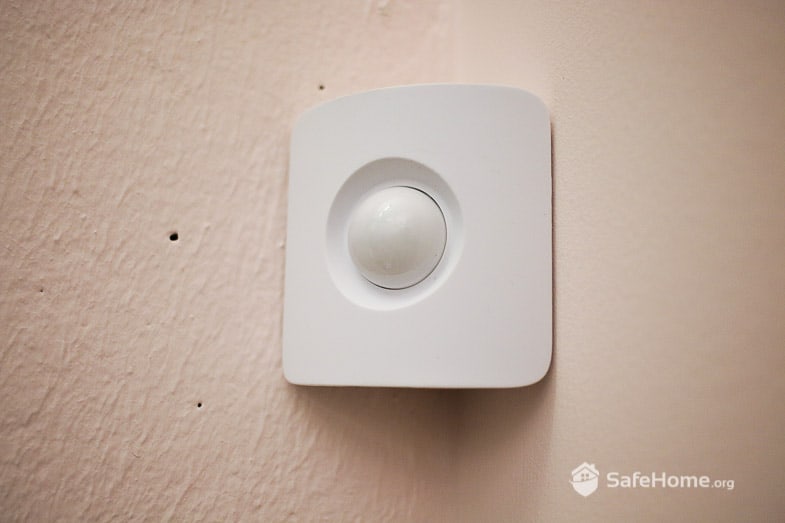
SimpliSafe – Motion Sensor
- Cost: $29.99 each
- Wired or Wireless: Wireless
- Tools Needed: No tools needed
- Setup Time: 2 minutes
- Online Installation Guide: Yes
- In-App Instructions: Yes
Motion Sensor Step-By-Step Installation Instructions
- Place on a shelf or adhere to your wall about 4-5 feet off the ground with the 'Test' button facing upwards. It should be mounted about the height of your light switches.
- Be sure not to place the sensor near a heater, air conditioner, lamp, or any other electronics including your Wi-Fi router.
- If you have a dog over 30 pounds, install the motion sensor button-side down about 4 feet off the ground.
- If you're a cat person, place the motion sensor where your cat cannot climb near it and with the button-side up about 6-10 feet off the ground.
SimpliSafe Entry Sensors
- Cost: $14.99 each
- Wired or Wireless: Wireless
- Tools Needed: No tools needed
- Setup Time: 5-10 minutes
- Online Installation Guide: Yes
- In-App Instructions: Yes
Entry Sensor Step-By-Step Installation Instructions
- Line up the magnet and sensor on your door or window so the grooves align and both pieces are less than two inches apart when the window/door is closed.
- Test alignment before adhering each piece using the included adhesive. The blue light should flash once when a door/window opens and twice when it's closed.
- Mount the sensor on your door and the smaller magnet on the doorframe, or vice versa.
Did You Know: With the exception of Abode, SimpliSafe's door/window sensors are the smallest sensors we've seen in the industry. This is important to us, as we want our security system to blend in with our home's decor, not stick out like a sore thumb.
SimpliSafe Water/Flood Sensors
- Cost: $19.99 each
- Wired or Wireless: Wireless
- Tools Needed: No tools needed
- Setup Time: Less than a minute
- Online Installation Guide: Yes
- In-App Instructions: No
Water/Flood Sensor Step-By-Step Installation Instructions
- Place your SimpliSafe water/flood sensor(s) on the floor, in the drip pan of your water heater, behind your washing machine, or near your bathroom or kitchen plumbing to detect overflows or broken pipes.
- You can use the provided adhesive tabs if you'd like, just be sure not to cover any of the six metal contact points on the bottom of the sensor.
SimpliSafe SimpliCam Camera
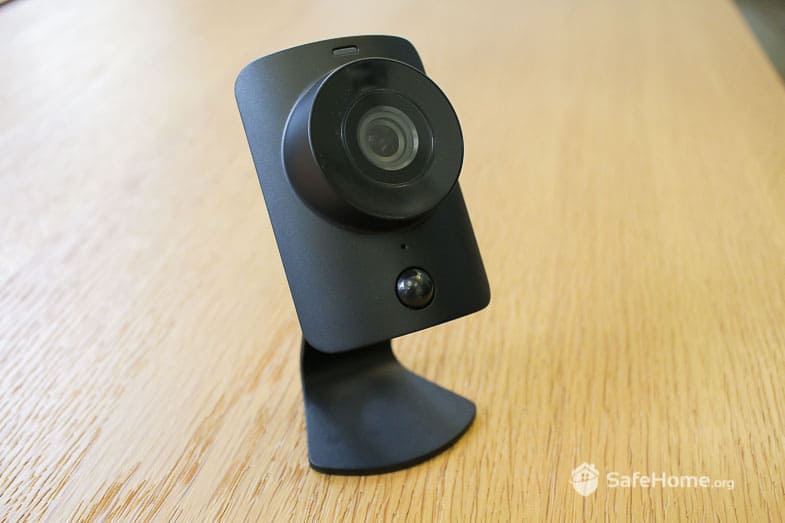
SimpliSafe SimpliCam
- Cost: $99 each
- Requirements: Wi-Fi connection, AC power. Note that this device doesn't use a cellular signal, so if your internet goes out, your cameras won't work.
- Wired or Wireless: Wired (power cord)
- Tools Needed: No tools required
- Setup Time: 5-10 minutes
- Online Installation Guide: Yes
- In-App Instructions: Yes
SimpliCam Step-By-Step Installation Instructions
- Open the box.
- Slide camera off of the stand.
- Insert Micro-USB into the port on the back of the camera.
- Replace the camera stand.
- Plug the cord into your power outlet.
- Use the SimpliSafe app to begin the installation.
SimpliSafe Video Doorbell Pro
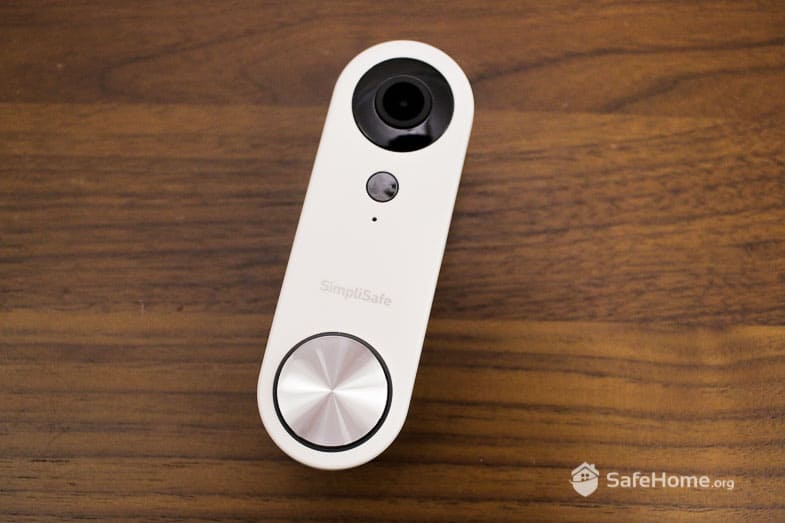
SimpliSafe – Video Doorbell
- Cost: $169 each
- Requirements: Wi-Fi connection (2.4Ghz), existing doorbell setup (8V to 24V) with an analog (mechanical) door chime
- Wired or Wireless: Wired video doorbell that must replace an existing doorbell. There is no battery option available.
- Tools Needed: Phillips head screwdriver
- Setup Time: 30 minutes on average for most people
- Online Installation Guide: Yes
- In-App Instructions: No
Video Doorbell Pro Step-By-Step Installation Instructions
- Turn off your power at breakers.
- Remove your old doorbell.
- Pull existing doorbell wires through the mounting bracket.
- Screw mounting bracket to the wall.
- Attach wires to the mounting bracket.
- Mount doorbell into place.
- Turn your power back on.
SimpliSafe Installation Help & Tips
Setting Up the Wi-Fi
As you'll recall, you'll connect the hub to your Wi-Fi at the beginning of the installation process; it's a quick and intuitive connection. To set up the Wi-Fi, press the 'Menu' button on your keypad. Next, enter your Master PIN, then navigate to 'System Settings', then select 'Wi-Fi' and continue setting up your Wi-Fi like you would any other wireless device.
FYI: Note that while SimpliSafe is powered by Wi-Fi, it also has cellular backup in case your power cuts out or your Wi-Fi lags. Although Wi-Fi isn't as fast or reliable as cellular systems like Vivint or Frontpoint, we still think it's a solid connection. In our experience, we didn't have any connection issues during testing.
Installation Videos
You'll find a few helpful videos on the SimpliSafe website. We watched the 'Install Core Devices' videos and we found them to be well-made and to-the-point. You'll also find plenty of third-party installation videos online; but the truth is, you really won't need them since the system is so simple to install.
Installation Manual
SimpliSafe also offers an online Installation Manual with complete installation instructions for each of the components, as well as instructions on how to use everything once you're up-and-running. This manual is quite detailed and offers more than enough information to install your system quickly and easily. This is nice, but we've found that most companies have online manuals these days.
Tools Required
Most SimpliSafe products can be installed with adhesive tabs, which are included in the box. Just be sure you have a Phillips head screwdriver handy if you order SimpliSafe's doorbell camera, the Video Doorbell Pro. Don't worry, if you're not handy around the house, SimpliSafe offers a professional installation service as well (see below). We're seeing this more and more with DIY brands. Sure, it's easy to do-it-yourself… but it's even easier to have someone else do it!
Professional Installation Service
SimpliSafe has certified technicians who will come to your home and set up your entire system in less than an hour for only $79.00. This is a great alternative to rolling up your sleeves. But then again, there's something to be said about installing a new system all by yourself. Either way, you have options.
Final Thoughts on SimpliSafe Installation
As you'll see in our full SimpliSafe review, we rated this DIY home security system a 9.7 in the ease-of-use category, which includes setup and installation. That's the highest rating we've ever given a product, and SimpliSafe earned it. Of course, SimpliSafe isn't the most advanced system out there — it lacks certain features like a touchscreen keypad, extensive home automation integrations, and an outdoor camera. But then again, this means there's less technology to trip you up.
Overall, we were quite impressed with SimpliSafe in the DIY installation department. It took about 20-30 minutes for us to install our system, from start to finish. And we appreciate that the company is (almost) always around for phone support in case you hit a roadblock. The bottom line is that SimpliSafe is a great value if you're looking for an affordable, user-friendly system that sets up in a jiffy and offers basic-to-intermediate home protection.
How to Install Simplisafe Entry Sensor on Door
Source: https://www.safehome.org/security-systems/simplisafe/installation/