Large Wooden Snowflake Wall Decor
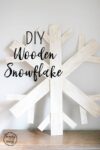
Do you love wall decor made from wood, but are afraid to pull out the power tools? This Easy DIY Wooden Snowflake with Balsa Wood doesn't even require a saw.
What?! I KNOW! Let's get started.

Even though here in Kentucky, it has been nearly 60 degrees for much of January, I still wanted to bring a little winter to our front door. Maybe we'll get some snow in February? If not, this wooden snowflake can bring me some cool-weather vibes.
How to Make Your Own DIY Wooden Snowflake
Supplies
- 4 Strips of Balsa Wood: 3/32 x 3 x 36 inches
- Measuring Tape
- Straight Edge
- Pencil
- Utility Knife
- Hot Glue and Glue Gun
- Metal Tacks or Small Nails
- Paint
- Paintbrush
- Clear and Dark Wax
- Rags
- Sanding Block
- Sawtooth Picture Hanger
Before you begin, measure the width of the door or wall space where the DIY wooden snowflake will hang.
This tutorial is for a 30″ diameter snowflake (it's big!), so adjust the measurements if the space you have available is smaller.
How to Make a DIY Wooden Snowflake
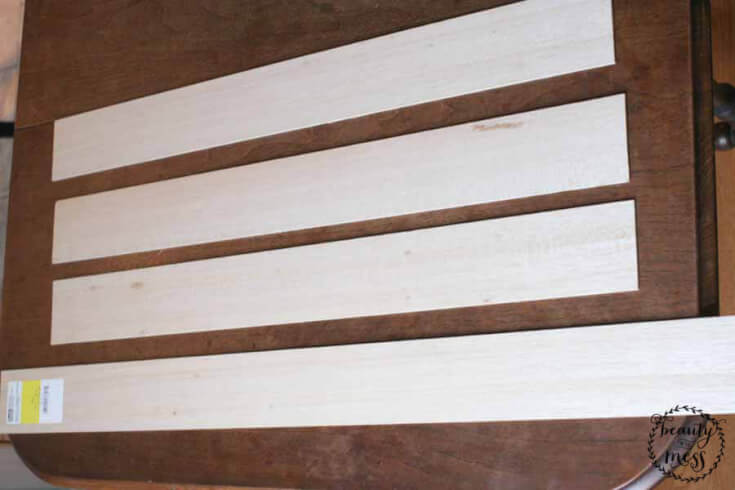
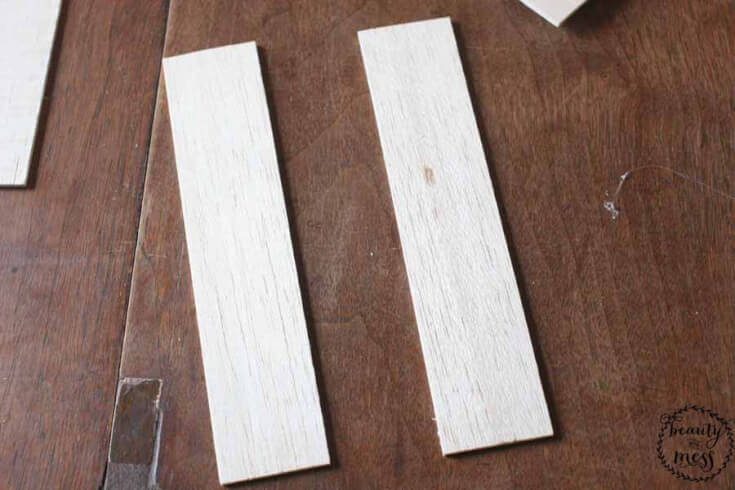
1. Cut 3 of 36″ Balsa Strips down to 30″ lengths
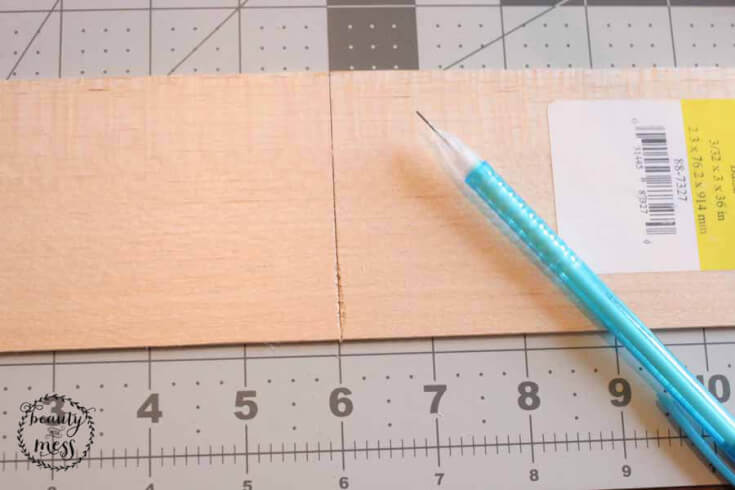
Use the straight edge to mark a line with a pencil and drag the utility knife over the line to cut.
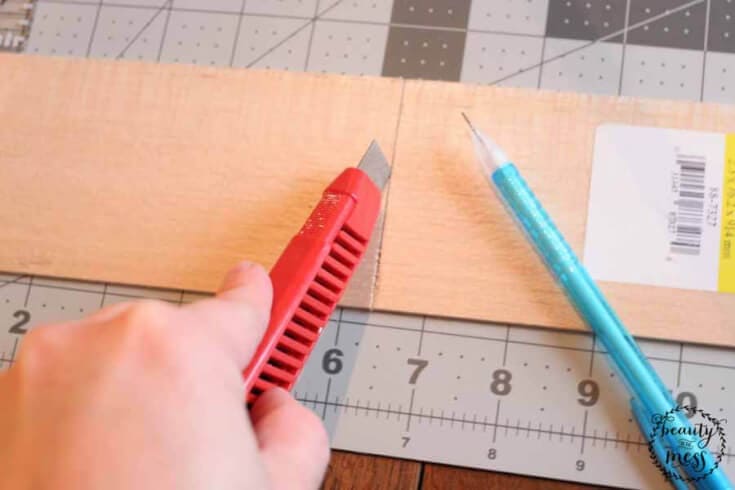
You may have to go over the line a couple times to cut all the way through. It will easily separate because Balsa Wood is thin and soft.
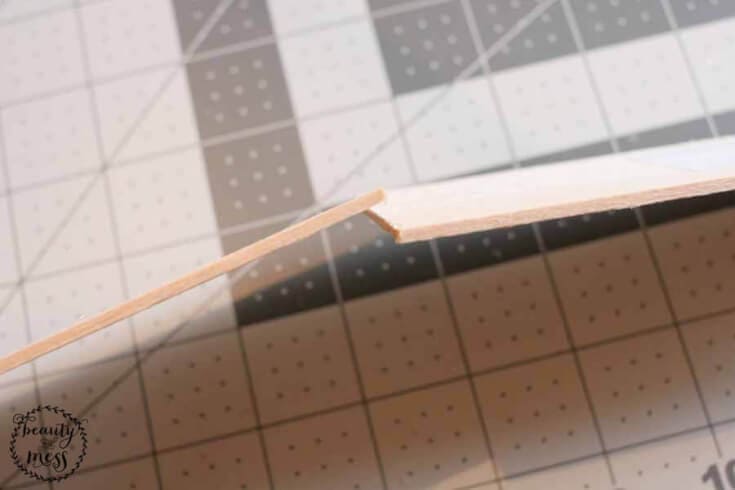
In fact, if you simply score the line, it will bend and break.
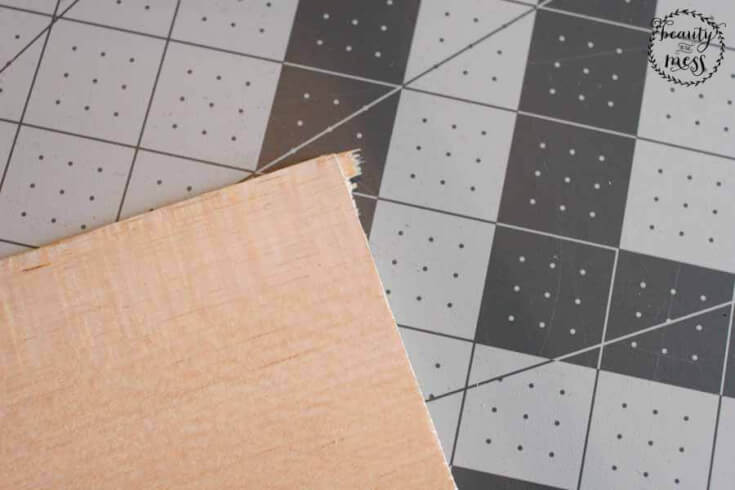
If there is any excess wood where it did not cut clean, simply remove the excess with the knife.
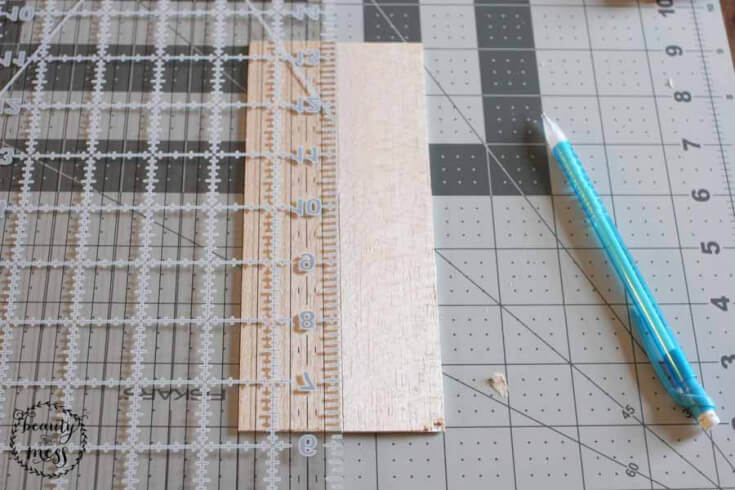
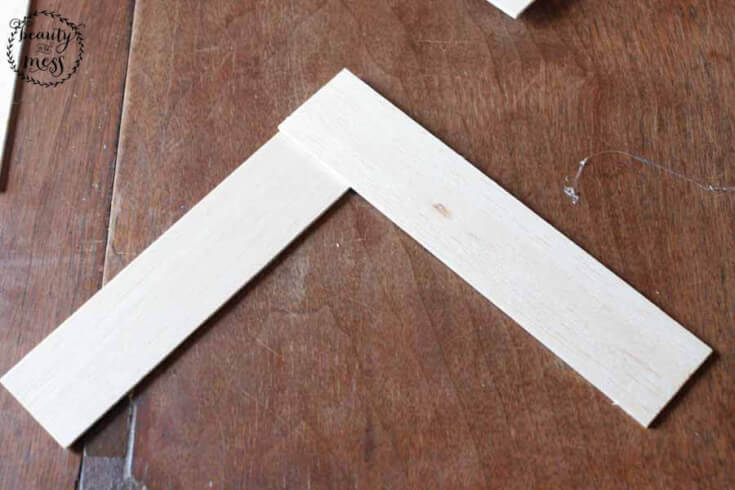
2. Mark the center of each 30″ inch strip of Balsa Wood on both sides

These marks will allow you to line up the pieces of wood when assembling the snowflake.

Once you have the centers marked, hot glue the pieces together and let dry.
3. From the remaining 36″ Balsa Strip, cut 3 more sections to match the length of the pieces that were left over from the 3 original 36″ strips.
Afterward, there should be 6 identical pieces.
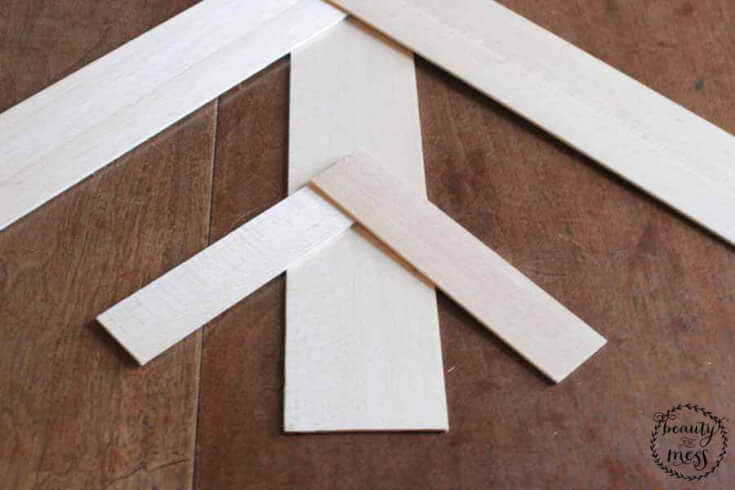
4. Cut the 6 pieces in half to create 12 6″ sections.
Draw a line, using the straight edge, along the center which will create 1.5″ wide pieces.
5. Assemble these into a "V" shape and hot glue the pieces together.
Once you've glued each set, there should be 6 "V" shapes to attach to the snowflake with hot glue.
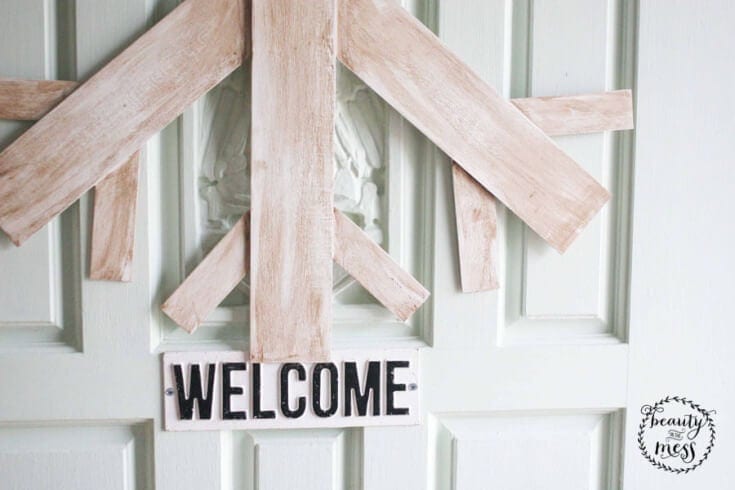
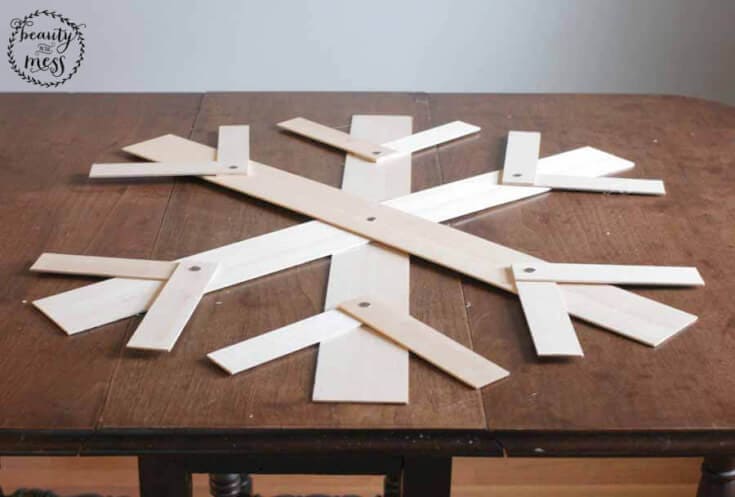
6. Assemble the pieces to create a snowflake
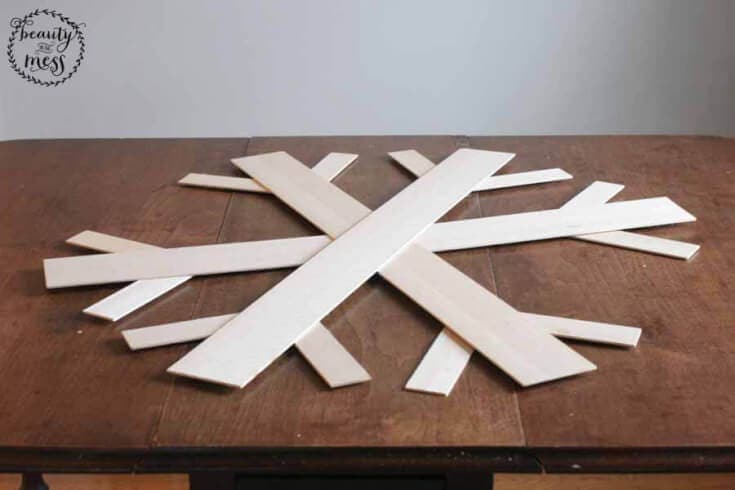
Press tacks or small nails through the glued portions for additional stability.
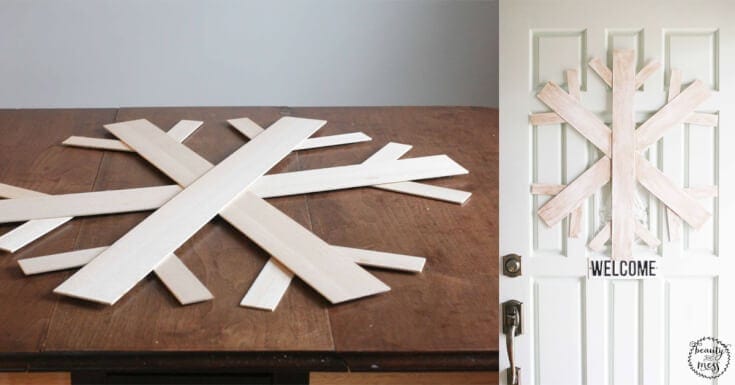
7. Paint or stain as you like!
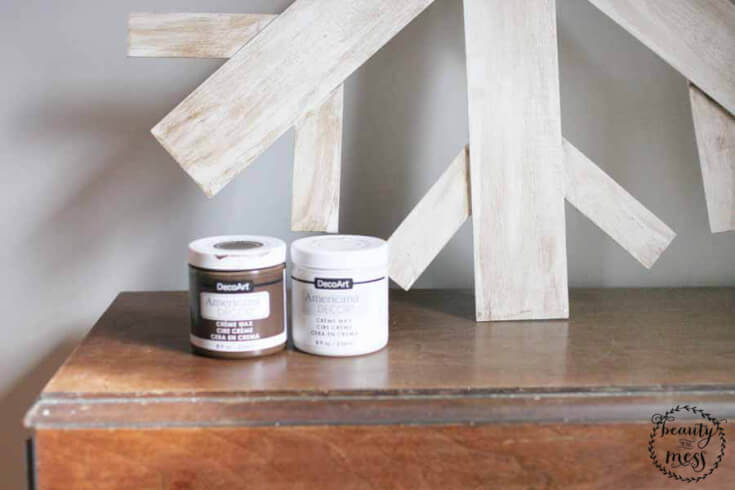
We have a light-colored door and walls, so I chose a rustic look for contrast. First, I applied two coats of white paint and sealed it with clear wax. To create depth, color, and a rustic vibe, I used dark wax wiped with a rag as the last coat. Finally, sand lightly to tone down the deep color of the dark wax.
8. Attach a picture hanger and hang your work of art!
The great thing about this project is that it is not limited to a DIY wooden snowflake.
You could make so many shapes with this lightweight wood — even if you aren't handy when it comes to power tools. Balsa is a perfect option for apartment dwellers who may not have access to a workshop. You can pick up Balsa in most craft supply stores like Michael's or Hobby Lobby.
I already have a few more ideas in mind for this lightweight product, such as custom canvas frames, faux pallet art, and large wood letters. The options are limitless.
What would you make for your home?

My name is Lora Green and I blog at Craftivity Designs, where I document how we are creating our home. I believe that a home is about much more than design and decor – it should tell the story of a family. Our home must fit the needs of two small kids, a work-at-home mom, and a youth pastor dad. I want it to be a beautiful space, but it should be functional and meaningful, too. If you are trying to meld function and beauty, join me over at Craftivity Designs to share in this journey of creating a home.
Large Wooden Snowflake Wall Decor
Source: https://simplifyingfamily.com/diy-wooden-snowflake/